The 1993 - 2002 4th Gen
Camaro and Firebird Trans Am
Technical Information Site
The WORLDS
best source of technical information for the
4th GEN
F-Body Camaro and Firebird
found anywhere
in the world!
Home
|
High intensity bulb replacement on your sealed beam head lights |
The
reason for this modification was that I couldn't find any High intensity sealed
beam replacements for my car. We are stuck with the factory type sealed
units which are not that bright as compared to the
newer Camaros. That sucked big time.
I found an article on how to replace the bulb in the sealed beam head lights, with new super bright bulbs for only the cost of the bulbs and some epoxy. He's a step by step on how you can do this mod yourself. There are no wires to cut or wiring mods needed, the new bulbs use the factory harness.
The following is what you we need to do the job:
2 - Sylvania 9005 ST Silverstar Bright white halogen bulbs (used for the high beams)
2 - Sylvania 9006 ST Silverstar Bright white halogen bulbs (used for the low beams)
1 - Tube of RTV sealant or JB-Weld quick set
1 - Blow torch
1 - Dremel tool with wire wheel
1 - Screw driver
1 - Single edge razor blade
WARNING - You assume all risk and safety for doing the above stated mod. Myself or this website assumes no responsibly what so ever. This is for instruction only!
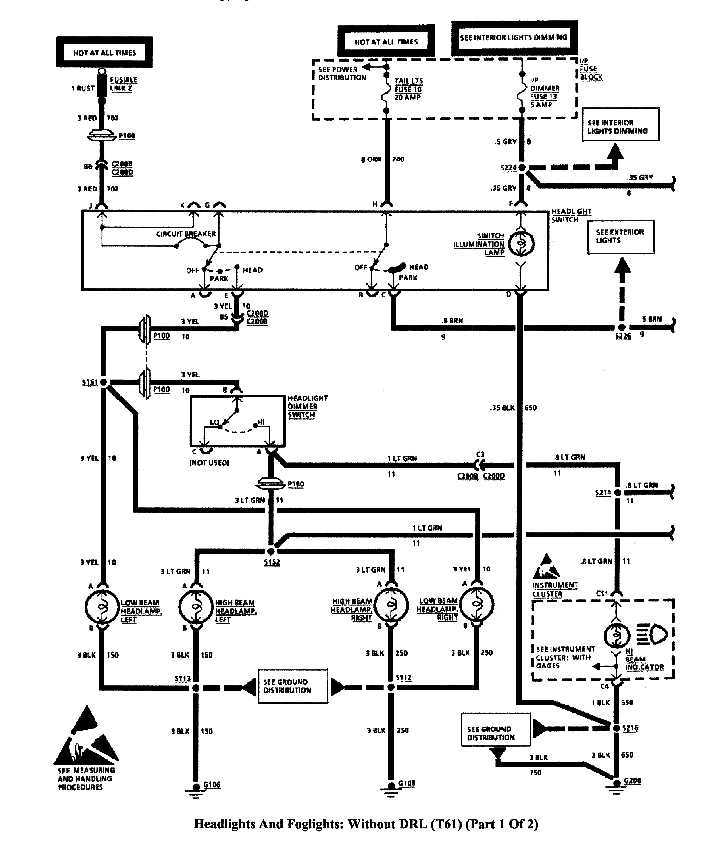
For your convenience, wiring diagram
|
Let's begin... 1 - Remove both the low beam lights first, in doing so you will not get them mixed up with the high beams. You will need a Torx bit to remove only 2 screws that hold each head lamps in place. |
Tap pictures to enlarge! |
|
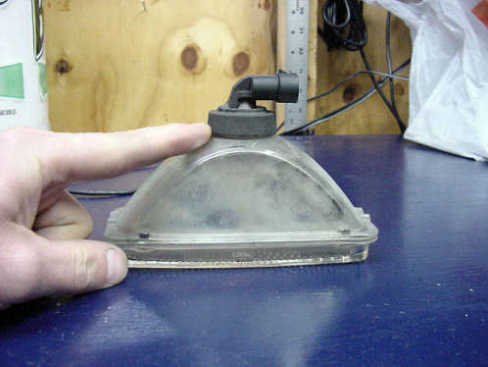
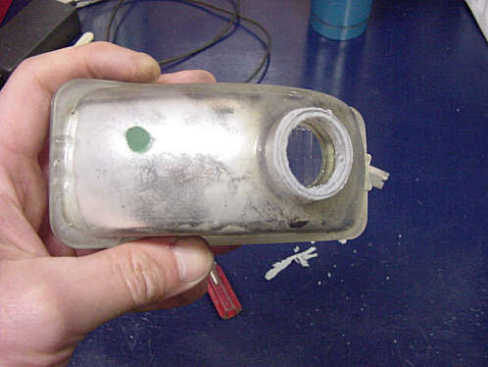
2
- Put the lamps onto your work bench or whatever you have. You will be
removing the plastic part that has the bulb glued onto the glass
housing. See picture 1. |
|
|
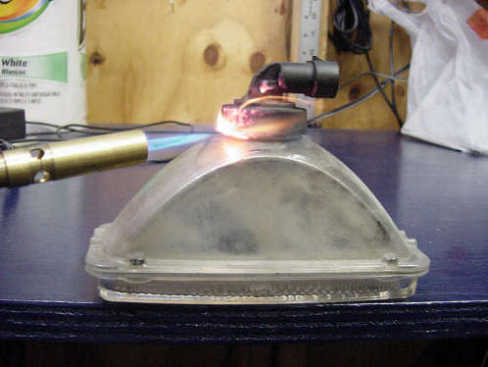
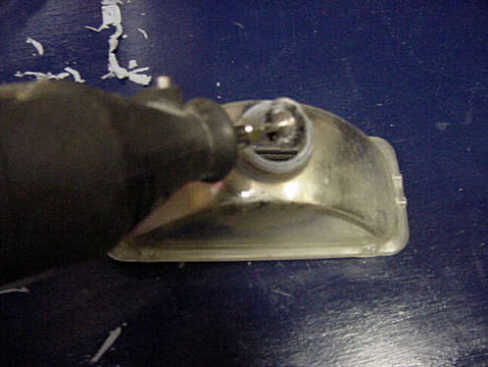
3 - Some guys or girls ( gotta include them too !) say that they use a screw driver to pop this off. Well I tried this and was afraid I'd break the glass. Since the bulb is glued on, I decided to use a blow torch to help melt and soften the glue. SAFETY TIP: YOU SHOULD WEAR LEATHER GLOVES AND A FACE SHIELD, JUST IN CASE THE BULB SHATTERS OR EXPLODES FROM THE HEAT, YOU WILL BE PROTECTED.
It only took about 30-40 seconds of heating the plastic all around to soften the glue. Now you can take your screw driver to pop the bulb the out. See picture 2. |
|
|
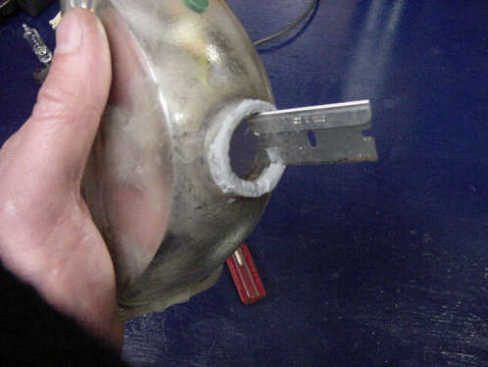
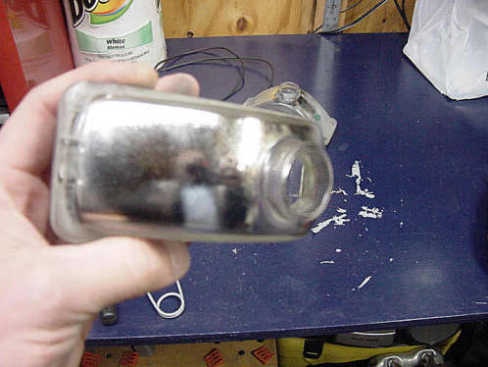
4
- Once you have the bulb separated from the glass unit you will see that the
old glue is blue in color. Use a razor blade to clean off the glue from
the housing. See Pictures 3 and 4. |
|
|
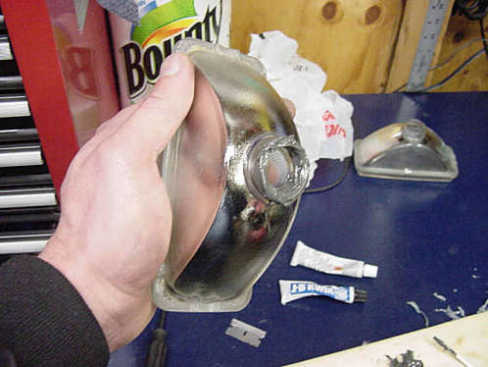
5
- Next you can use steel wool or sand paper to
remove the remaining glue off the glass. I choose
to use my handy dandy Dremel tool with a wire wheel. Man
I love this tool !!! See Pictures 5 and 6. |
|
|
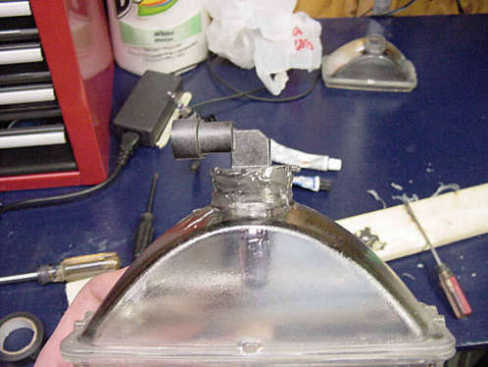
6 -
Use a rag to clean things up. Using RTV sealant or JB-Weld smear it
around the inside opening, the top and on the outside of the opening.
See Picture 7. |
|
|
7 -
Now take the new bulb ( DO NOT TOUCH THE ACTUAL BULB PART WITH YOUR FINGERS OR ANYTHING ELSE, YOU WILL DAMAGE THE BULB AND SHORTEN IT'S LIFE SPAN.)
If you do touch it, clean it with alcohol and tissue. OK, now that we got that out of the way, we will continue. Carefully insert the bulb into the sealed beam. Once fully inserted, smear the RTV sealant or JB-Weld whatever you used around the plastic and glass to form a seal. See Picture 8. |
|
|
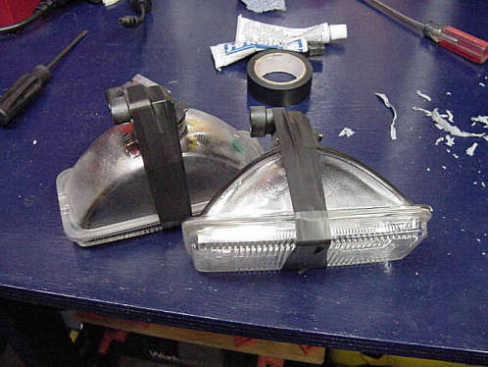
8 -
I used some electrical tape to hold the bulb down so it would not pop off
from the heated air inside the sealed beam. See Picture 9. |
|
|
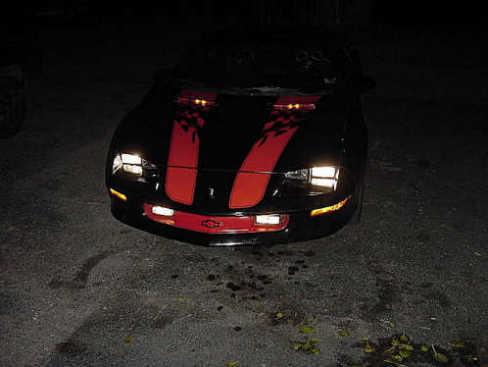
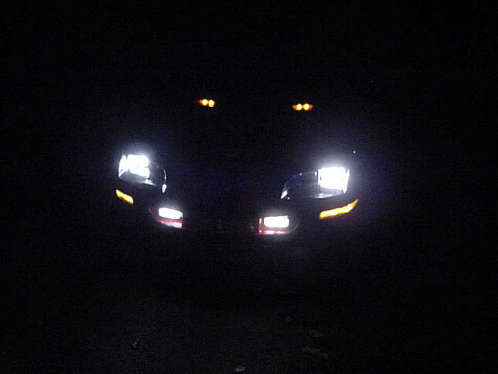
9 - After about a 1/2 hour I replaced the head light back into the car with the tape still in place. The next day, I just cut the tape off with a razor blade. That's it !!! |
|
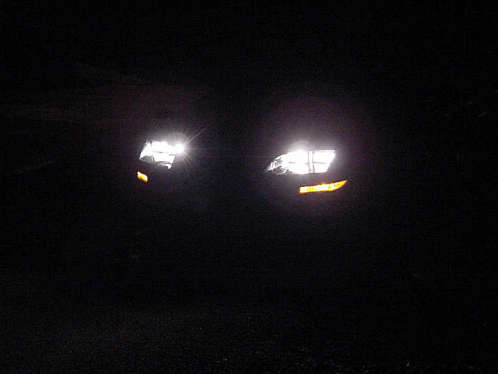
Here's the results

The WORLDS
best source of technical information for the
4th GEN
F-Body Camaro and Firebird
found anywhere
in the world!
Click on the links below to start cruising
My BF
Goodrich and Nitto Drag Radial Review
LS1 /
LT1 clutch bleeding, WITHOUT getting under the car
Technical Aides - "Mostly GM PDF's" - 150 files to download for FREE!
Great Links - Great pages of links to other sites
Here's
a detailed review of the Summit non-polished 58mm throttle body.
Home